You don’t need to go to the salon anymore to have beautiful hands and nails. You just need the right tools and products to get you going. Doing your DIY manicure at home has its learning curves. You might not be 100% satisfied at your first attempt, but once you get the hang of it, you will be amazed at how relaxing and satisfying it is. Follow below our step-by-step guide and get your manicure right.
WHAT YOU WILL NEED FOR DIY MANICURE
- Polish remover & cotton pads to remove your nail polish
- A bowl with water, soap, and a nail brush to clean your nails and hands
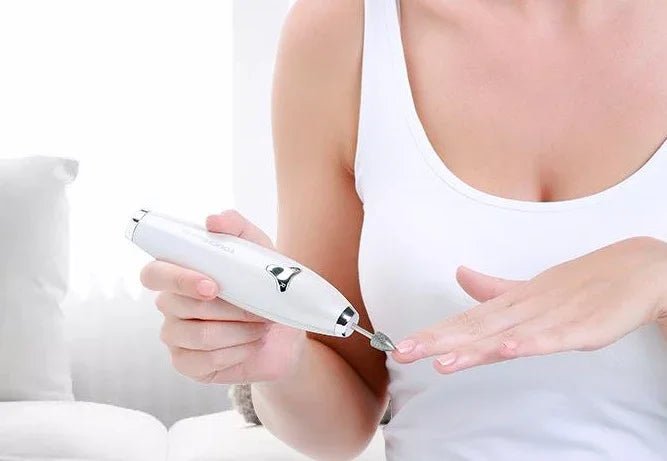
- TOUCHBeauty’s 6-In-1 Electric Manicure/Pedicure Set
- Your favorite nail polish (if you will apply color nail polish, make sure to have also a good base coat and top coat)
- 1 towel, cotton swabs, cuticle oil

How often should I get a manicure?
It will depend on the condition of your hands and nails, but typically it is suggested to leave 2 or 3 weeks between treatments. If you get manicure frequently, it can damage your nails.
MANICURE STEP-BY-STEP
STEP 1 Remove Old Nail Polish & Clean Your Nails
If you applied nail polish before, the first step is to remove it with a gentle polish remover. Use a good and gentle polish remover that protects and strengthens your nails. If you have gel nail polish, use TOUCHBeauty’s manicure set to remove it easily and quickly. Afterwards, prepare a bowl with warm water and moisturizing soap. Soak your hands for a few minutes to soften cuticles and clean your nails with a nail bristle brush to remove all dirt and debris.
STEP 2 File, Shape, Buff & Polish with the 6-In-1 Manicure/Pedicure Device
If you want to have a DIY manicure at home, you must have an electric manicure set. TOUCHBeauty’s 6-In-1 Electric Manicure/Pedicure Set has everything you need to have a perfect manicure. It comes with six head attachments to clean, file, shape, buff, and polish nails. This device also has six adjustable intensity rotation levels and two-way rotation to give you maximum control. The attachments come in a separate case for convenient storage.
Learn below how to use electric nail care tools correctly for the best results.
Tungsten Steel Head - Polish Remover
Use this attachment to remove old gel polish from your nails. With this attachment, you don’t need to go to a salon to remove your nail polish. You can do it easily, effectively, and quickly from the comfort of your home. Just apply the attachment on the nail with very light pressure to start removing your old gel nail polish. It should come off effortlessly.

Emery Heads (Fine & Coarse) - Shorten & Shape
This device comes with two emery head attachments, one fine and one coarse. The difference between these attachments is the texture. One is softer and gentler, while the other one is coarser. With these attachments, you can shorten and shape your nails according to your preference. You can go for a square or round shape.

Chrome Head - Nail Buffer
Use the chrome head attachment to buff and clean around your cuticles. You can also use this attachment on the surface of the nail to remove any texture. Take your time to buff your nails to get rid of any ridges and create a smooth surface for your nail polish to sit nicely.

Needle Emery Head - Precision Cleaner
This attachment is very thin (just like a thicker needle) to give you the ultimate precision when cleaning away hard skin on the sides of the nails.

Felt Cone Head - Brightening & Smoothing
This attachment provides glossier and smoother nails. It will also help to remove any debris created by the previous attachments. Apply the attachment to your nail with very light pressure and glide back and forth on all the surface of your nail for a glossy finish.

STEP 3 Moisturize Your Hands & Cuticles
After you finish your nails shaping & buffing, it is time to moisturize your hands and cuticles. This step will make sure your cuticles are healthier, and your hands are soft.
STEP 4 Apply Your Favorite Nail Polish
Make sure you apply nail polish on clean nails that are not oily or greasy. Always use a base coat before you apply your color nail polish. Using a base coat will protect your nails, and the top cot will make sure your nail polish will stay for longer. When applying your nail polish, you need to apply thin layers of nail polish. Thicker layers are harder to dry, and the nail polish can smudge easily. If you are using gel polish, you will benefit by drying each layer of nail polish with a nail drying device that uses UV lights.
BUY NOW


Leave a comment
All comments are moderated before being published.
This site is protected by hCaptcha and the hCaptcha Privacy Policy and Terms of Service apply.